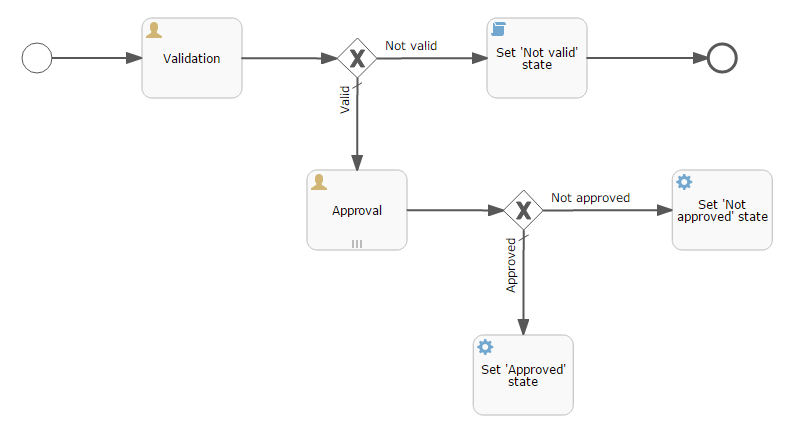
The final version of process model will look like this:
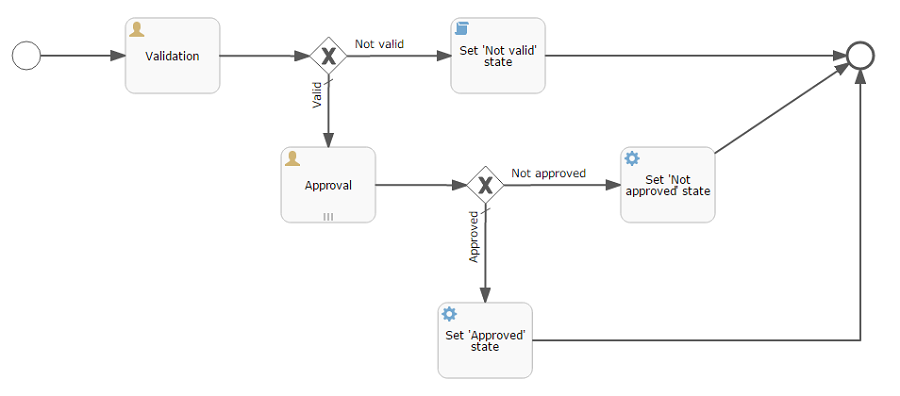
Let’s look at the sequence of steps to create the model.
Open the screen BPM → Process models in the running application web interface and press Create. Enter the model name Contract approval and press OK. A new browser tab Model editor will be opened.
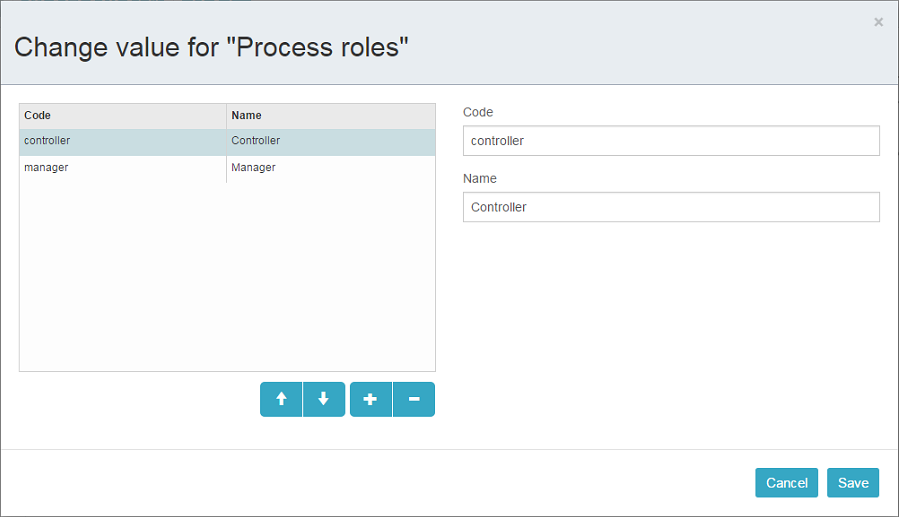
Select the Process roles property in the model properties panel. The process roles edit window will be opened.

There are 2 types of actors participate in the process: a manager and a controller. Create 2 roles: Controller and Manager.
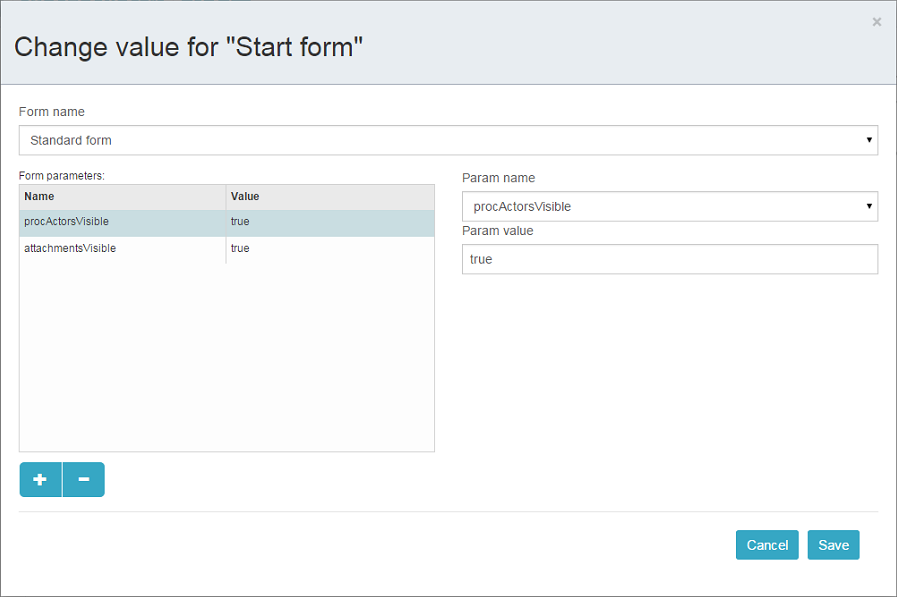
Drag and drop the Start event node from the Start Events group to the workspace. We need to display a form to select the process actors when the process starts. Select the start
event node. Select the Start form in its properties panel - a form selection window will be opened. Select Standard form in the Form name field. Then add 2 form parameters:
procActorsVisiblewithtruevalue indicates that a table for process actors selection will be displayed on the formattachmentsVisiblewithtruevalue indicates that a table for attachments upload will be displayed on the form
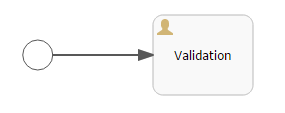
Add the User task node from an Activities group to the model. Name it Validation.
Select this node and assign the controller value to the Process role property at the properties panel. This is how we defined that the task will be assigned to a process actor with controller role.

Next select the Task outcomes property. The window for task outcomes edit will be opened. Outcomes define possible users actions when users receive tasks.
Create 2 outcomes: Valid and Not valid. Define the Standard form for both outcomes. Add form parameter commentRequired=true for the Not valid outcome, because we want to make a user add a comment in case of invalid contract.

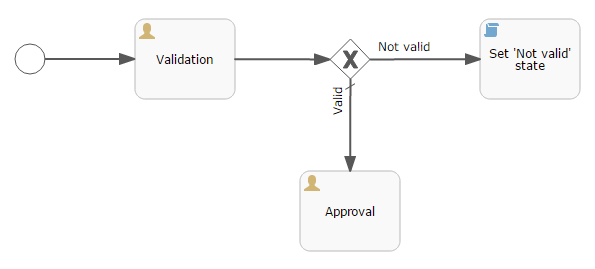
Depending on the controller’s decision we have to send the contract to managers approval or to finish the process with the
Not valid state. The Exclusive gateway node from the Gateways group is used to control the process flow. Add it to the workspace and then add 2 more elements: Script task with Set 'Not valid' state name and User task with Approval name. Name the flow to the Script task as Not valid and the flow to the User task should be named Valid.
Select the Not valid flow. Expand the dropdown list Flow outcome from the properties panel. It shows outcomes from the tasks before the gateway. Select the Not valid value.

Now, if the Not valid outcome is selected, a transition to this flow will be performed.
The Valid flow should be marked as the default flow (if no other flows condition are true). Select the Valid flow and tick the Default flow property.
Next select the Exclusive gateway and open its Flow order property editor. Make sure that the Not valid flow goes on the first place in a list. If it is not true then change the flows sequence.

Let’s move to the Set 'Not valid' state node. We need to set the state property of the Contract entity to the Not valid value. Select the node. Set the Script format property value to groovy. Click on the Script property field - the script editor will be opened. Copy and paste the following code there:
import com.company.demo.entity.Contract

def em = persistence.getEntityManager()
def contract = em.find(Contract.class, entityId)
contract.setState('Not valid')
You are allowed to use the process variables and platform objects persistence and metadata (see CUBA Platform. Developer’s Manual) in scripts. An entityId variable is created on process start and stores an identifier of the linked entity.
After the contract state is changed, the process should be finished. Let’s add an End event node from the End events group to the workspace and link the node with the Set 'Not valid' state.
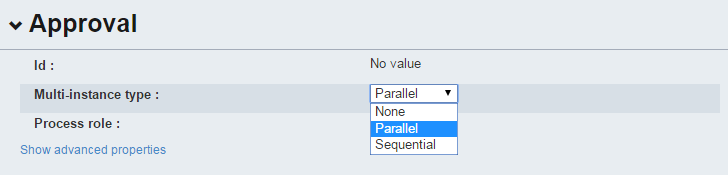
Let’s go back to the Approval task. Define the manager process role for it like we did for the first task. In order the task to be assigned to many managers simultaneously set
its Multi-instance type property to Parallel.
Create 2 task outcomes: Approve and Reject (Task outcomes property). For both outcomes set the Standard form form and set commentRequired parameter to true for the Reject outcome.
After the approval is completed, or Approved either Not approved status should be assigned to the contract depending on the approval result. Add an Exclusive gateway node after the Approval task. Add 2 Service task after the exclusive gateway: Set 'Approved' state and Set 'Not approved' state. They will do the same thing as the Script task we added earlier, but in another way. They will invoke a Spring bean method.
Name the flow to the Set 'Approved' state as Approved, and name the flow to the Set 'Not approved' state as Not approved.
Select the Not approved flow node and select the Reject value in the Flow outcome list. Now if at least one of the managers performs the Reject action then this outcome will be initiated. Select the Approved flow node and check the Default flow checkbox. This means that if no other flow is initiated then this flow will be used.
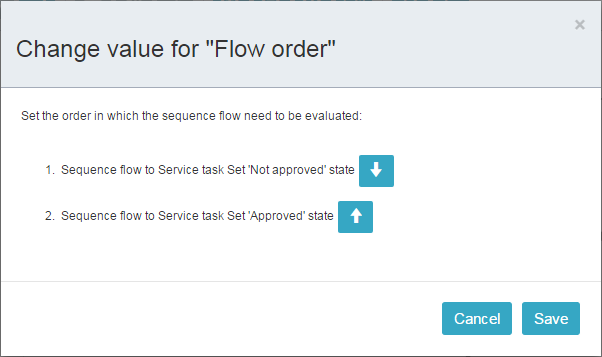
Set the flow order for the Exclusive gateway like we did for the previous one. Select the Exclusive gateway and open the Flow order property editor. Not approved should be processed first.
Let’s go back to the Service task. Select the Set 'Approved' state node and set its Expression property to the following value:
${demo_ApprovalHelper.updateState(entityId, 'Approved')}Apply the following script for the Set 'Not approved' state:
${demo_ApprovalHelper.updateState(entityId, 'Not approved')}Activiti engine is integrated with the String framework, so we can access Spring managed beans by their names. entityId is a process variable that stores an identifier of the contract which is linked to the process. Its value is set on a process
start.
Link both Service tasks with the End event and press the save model button. The model is ready and we can move to the model deployment.
