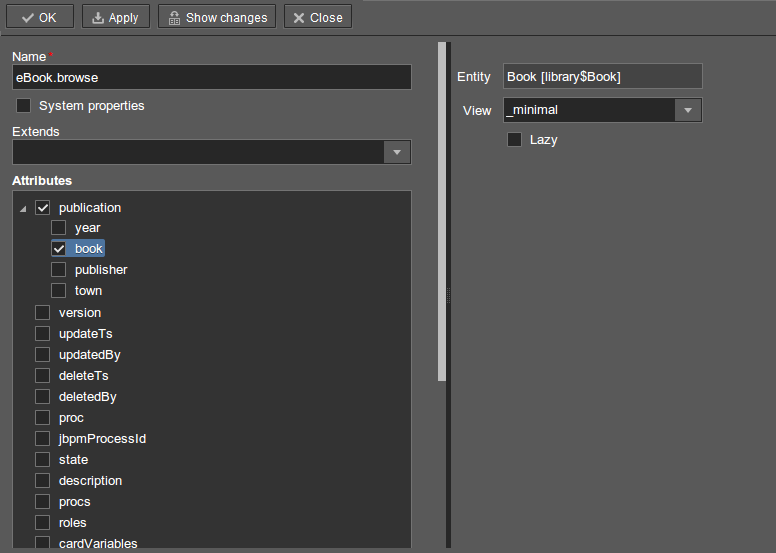
Let us create the standard browser and editor for the EBook entity. To do this, we must first define views for these screens.
Select EBook in the Entities section of the navigation panel and click . Set the view name in the Name field to eBook.browse. All local (non-reference) entity attributes in the Attributes panel are selected by default. Uncheck them all and select publication, which is the only attribute that we need at this stage. Since this attribute is a reference to the BookPublication entity, the tree displays the attributes of this entity. Check the book attribute, and select _minimal in the View field on the settings panel on the right. Save the changes.
Now, if you open the views file in IDE, it will contain the following descriptor:
<view class="com.sample.library.entity.EBook"
      name="eBook.browse">
    <property name="publication">
        <property name="book"
                  view="_minimal"/>
    </property>
</view>
Similarly, let us create an eBook.edit view for the editor. At this stage, this view is identical to eBook.browse, but they will be different in the future.
After creating the views, select EBook in the Entities section of the navigation panel once again and click . In the window that appears, select eBook.browse for Browse view, eBook.edit for Edit view, and click . The Studio will open the Screens section of the navigation panel and display the created screens.
After creating the standard screens, you can launch the server ( -> ), log in to the application and make sure that the EBook entity is functional.


