A typical filter is shown below:
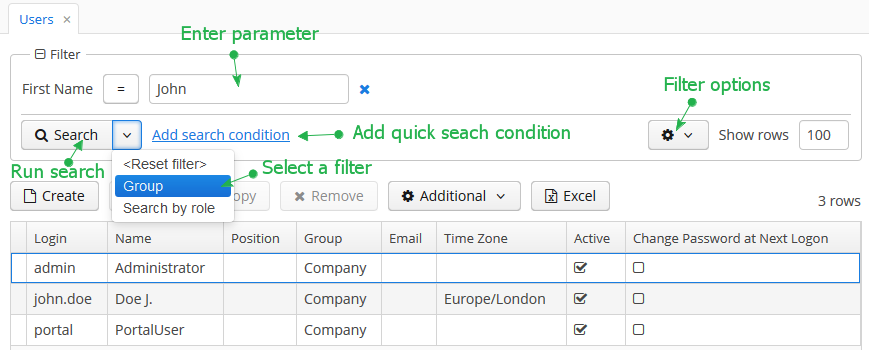
By default, the component is in quick filter mode. This means that a user can add a set of conditions for a one-off data search. After the screen is closed, the conditions will disappear.
To create a quick filter, click link. The condition selection screen will be displayed:
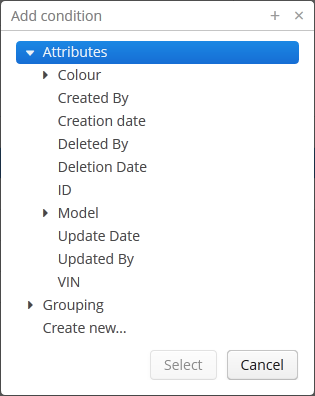
Possible condition types are described below:
-
Attributes – attributes of this entity and related entities. Only persistent attributes are displayed. They should also either be explicitly set in the
propertyelement of the filter XML descriptor, or comply with the rules specified in thepropertieselement (see below). -
Custom conditions – conditions specified by developer in the
customelements of the filter XML descriptor. -
Create new... – allows creating a new arbitrary JPQL condition. This option is only available to users having the specific
cuba.gui.filter.customConditionspermission.
Selected conditions are displayed at the top of the filter panel. The  icon will appear next to each condition field, allowing them to be removed from the set.
Quick filters can be saved for further re-use. In order to save a quick filter, click the filter settings icon, select and provide a new filter name in the popup dialog:
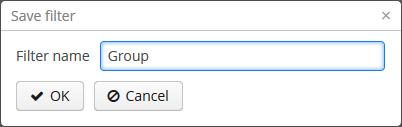
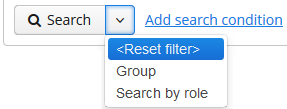
After that, the filter will be saved and will appear in the drop-down menu of the button.
The filter settings popup button provides the list of options for filter management:
-
– save changes to the current filter.
-
– save the filter under a new name.
-
– open the filter editor (see below).
-
– make the filter default for this screen. The filter will be automatically displayed on the filter panel when the screen is opened.
-
– delete the current filter.
-
– use the results of the last search for sequential data filtering (see Section 4.5.2.1.9.5, “Applying Filters Sequentially”).
-
– create a search folder based on the current filter.
-
– create an application folder based on the current filter. This option is available to users having the specific
cuba.gui.appFolder.globalpermission only.
The option opens the filter editor, allowing advanced configuration of the current filter:
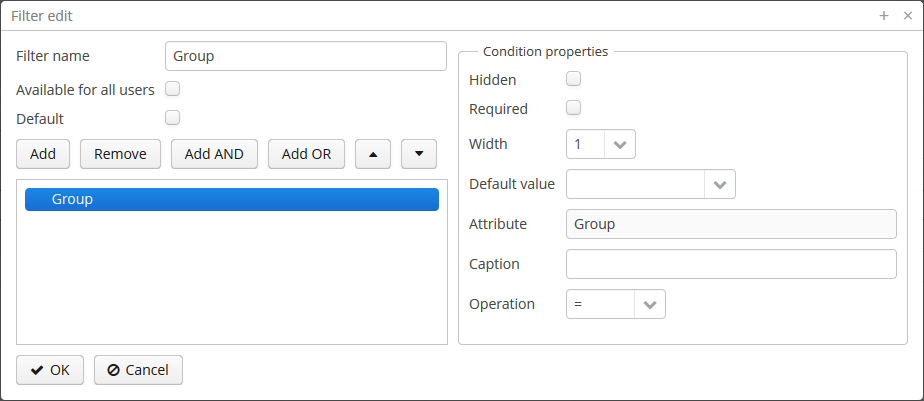
Filter name should be provided in the Name field. This name will be displayed in available filters list for the current screen.
Filter can be made global (i.e., available for all users) using the Available to all users checkbox, or default using the Default checkbox.
The filter conditions are contained in the tree. They can be added using the button, swapped using  /
/ or removed using the button.
AND or OR grouping conditions can be added with the help of the corresponding buttons. All top level conditions (i.e., without explicit grouping) are joined with AND.
Selecting a condition in the tree opens the list of its properties in the right part of the editor.
The conditions can be made hidden or required by means of corresponding checkboxes. The hidden condition parameter is invisible to the user, so it should be provided when the filter is being edited.
Width property allows selecting the width of the parameter field on the filter panel for the current condition. By default, conditions on the filter panel are displayed in three columns. The field width equals to the number of columns it will occupy (1, 2 or 3).
Default parameter value for the current condition can be selected in the Default value field.
A custom caption for filter condition can be provided in the Caption field.
Operation field allows selecting the condition operator. The list of available operators depends on the attribute type.
If filter has not been previously saved, clicking OK in the filter editor saves the changes to the filter only for the current search. In order to keep them for further use, click the button and Save/Save as. Otherwise, all changes will disappear once the screen is closed.
