The Web Client module of the cuba base project contains JMX objects viewing and editing tool. The entry point for this tool is com/haulmont/cuba/web/app/ui/jmxcontrol/browse/display-mbeans.xml screen registered under the jmxConsole identifier and accessible via > in the standard application menu.
Without extra configuration, the console shows all JMX objects registered in the JVM where the Web Client block of the current user is running. Therefore, in the simplest case, when all application blocks are deployed to one web container instance, the console has access to the JMX beans of all tiers as well as the JMX objects of the JVM itself and the web container.
Names of the application beans have a prefix corresponding to the name of the web-app that contains them. For example, the
app-core.cuba:type=CachingFacade bean has been loaded by the app-core web-app implementing the Middleware block, while the app.cuba:type=CachingFacade bean has been loaded by the app web-app implementing the Web Client block.
JMX console can also work with the JMX objects of a remote JVM. This is useful when application blocks are deployed over several instances of a web container, for example separate Web Client and Middleware.
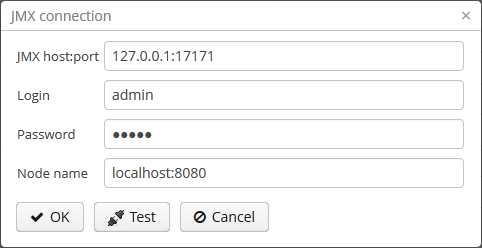
To connect to a remote JVM, a previously created connection should be selected in the JMX Connection field of the console, or a new connection can be created:
To get a connection, JMX host, port, login and password should be specified. There is also the Host name field, which is populated automatically, if any CUBA-application block is detected at the specified address. In this case, the value of this field is defined as the combination of cuba.webHostName and cuba.webPort properties of this block, which allows identifying the server that contains it. If the connection is done to a 3rd party JMX interface, then the Host name field will have the "Unknown JMX interface" value. However it can be changed arbitrarily.
In order to allow a remote JVM connection, the JVM should be configured properly (see below).

