Do the following to display the list of Orders in the Customer’s edit screen:
-
Go to the Screens tab on the navigation panel. Choose
customer-edit.xmlscreen and click . -
Go to the Datasources tab on the screen designer page and click .
-
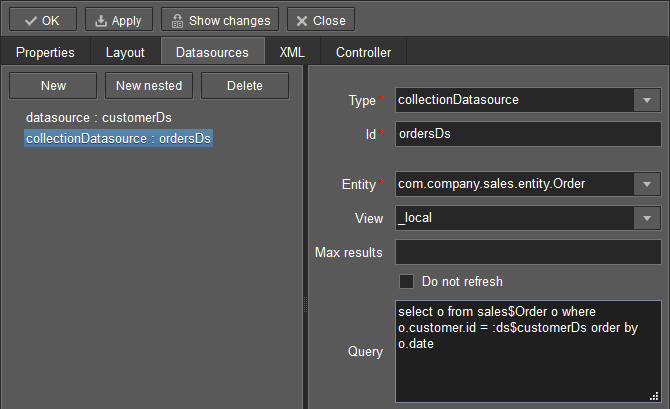
Select the newly created data source in the list. Its attributes will appear in the right part of the page.
-
Specify
collectionDatasourcein the Type field. -
In Id field enter the data source identifier −
ordersDs. -
Select
com.sample.sales.entity.Orderentity in the Entity list. -
Select
_localview in the View list. -
Enter the following query in the Query field:
select o from sales$Order o where o.customer.id = :ds$customerDs order by o.date
The query contains orders selection criterion with
ds$customerDsparameter. The parameter value named likeds${datasource_name}will contain id of the entity selected indatasource_namedatasource at the moment, in this case it is the id of the Customer being edited.
-
Click to save the changes.
-
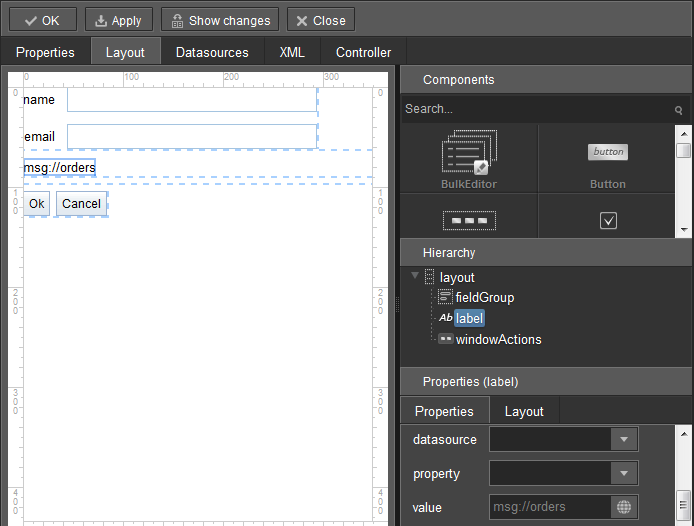
Next go to the Layout tab in the screen designer and find the
Labelcomponent in the components palette. Drag this component to the screen components hierarchy panel and place it betweenfieldGroupandwindowActions. Go to the Properties tab in the properties panel. Entermsg://ordersin the value field. Click the button next to the value field and define label values in available locales.

If the application is not intended to be used in multiple languages, the value in the value field can be entered straight in the required language.
-
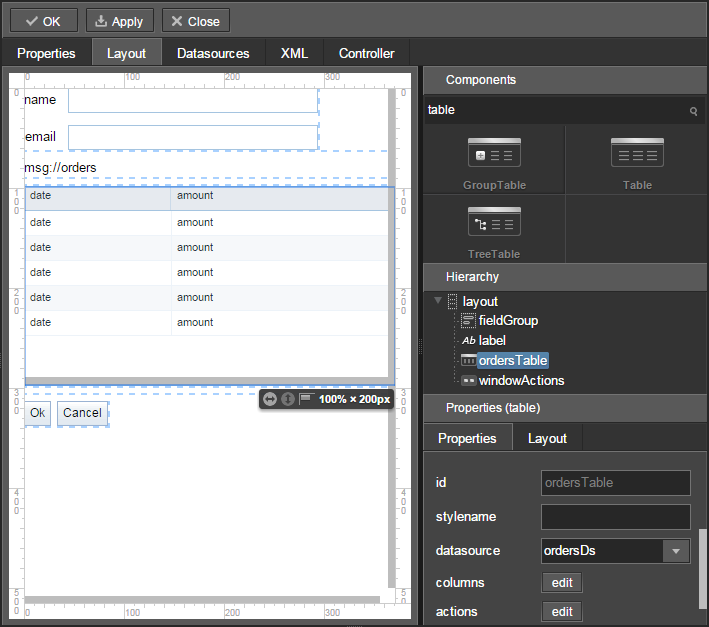
Drag
Tablefrom the components palette to components hierarchy panel and place it betweenlabelandwindowActions. Select this component in the hierarchy and specify table size in properties on the Layout tab: set100%in width field and200pxin height field.Go to the Properties tab. Set
ordersTablevalue as id, chooseorderDsfrom the list of available datasources.
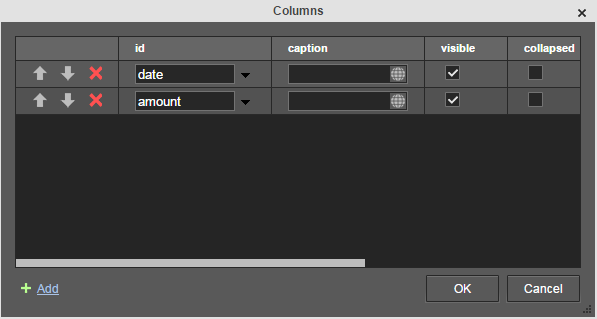
Next, click the button for columns. The table columns editor window will appear on the screen. Select the
datevalue from the drop-down list in the first line of the id column, andamountin the second line.
-
Click in the upper left corner of the screen designer page to save the changes in Customer edit screen.

